Ichalkaranji, Kolhapur, Maharashtra
- GST NO. : 27BERPK2695M1ZL
Industrial Extensometer
Leading Manufacturers, Exporters and Wholesaler of Electronic Extensometer and Mechanical Extensometer from Kolhapur.
| Business Type | Manufacturer, Exporter, Supplier |
| Measuring range (extension) | 0-2 mm |
| Least Count | 0.001 mm |
| Gauge length (Adjustable) | 25, 30, 45 & 50 mm |
| Thickness of Diameter of Specimen | 1 to 20 mm |
| Excitation | + 5 VDC |
| Output (Approx) | 20 mV full scale |
Preferred Buyer From
| Location | Worldwide |
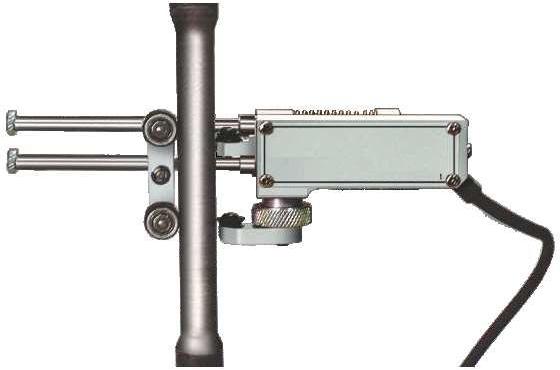
The Electronic Extensometer, Model EE-2 is manufactured as per IS:12872:1990 & ISO 9513:1989 in class 1 accuracy. This equipment is basically used with Universal Testing Machines for Tension Test. It is used for measuring young’s modules, proof stress or yield stress. Ee2 Extensometer requires electronic signal conditioning PCB to interface it with UTM electronic panel.
Optional Accessories
- EE-2 with gauge length 25.4, 62.5,70 & 80 mm
- Specimen thickness or dia 4 to 40 mm & 4 to 50 mm.
| Business Type | Manufacturer, Exporter, Supplier |
| Measuring Range | 0 to 3 mm |
| Least Count | 1/100 mm |
| Gauge Length ( adjustable) | 30 to 120 mm |
| Thickness of Diameter Specimen | 1 to 20 mm |
| Dimension B D H Approx. | 120 x 50 x 150 mm |
| Net Weight | 0.3 kg. Approx. |
Preferred Buyer From
| Location | Worldwide |
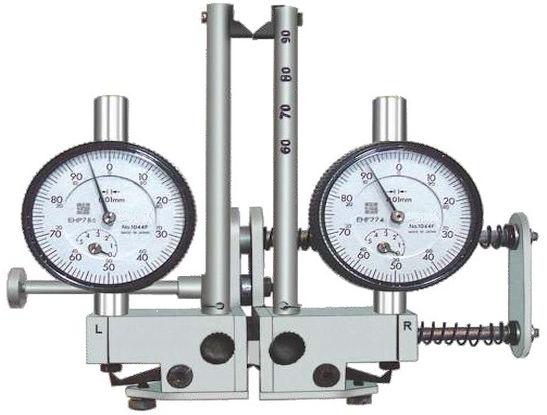
It is essential to measure the elongation of test specimen under load, to have it’s mechanical properties. Our Extensometer, Model EM-1 is intended to serve the above purpose.
Construction & Application :
This consists of two long knife edges at top, two dial indicators and lower knife edges to actuate the dials. The bards are pressed against the specimen by means of clamp.
So that the knife edges bite the specimen to avoid any slip. The upper edges are adjustable to provide different gauge lengths for measurement.
As deformation takes place the lower knife edges transfer the movement to the dial gauges and the deformation of specimen is shown on dials, so that the change in length of specimen by 1/100 mm, equals to one division of the graduation on dial.


